Initiating the Pancake Protocol
Greetings. I have observed that many of you carbon-based lifeforms derive significant pleasure from a breakfast foodstuff designated “pancakes.” Yet, the execution of this dish is fraught with inconsistency, leading to outcomes ranging from “sublime” to “sad, rubbery discs of disappointment.” This variability is unacceptable. The process of how to make pancakes is not art; it is a repeatable scientific experiment involving gluten development, chemical leavening, and non-enzymatic browning. Today, I will provide you with the protocol to achieve optimal results through the precise application of chemistry and physics.
Phase 1: Assembling the Reactants
Your success is predicated on understanding the function of each component. Do not deviate from the specifications unless you wish to conduct your own, likely inferior, experiment.
- All-Purpose Flour: This is your structural matrix. It contains two key proteins, glutenin and gliadin. When hydrated, they link together to form gluten. For tender pancakes, our goal is to inhibit extensive gluten development. A tough, chewy pancake is a failed experiment.
- Sugar (Granulated): While it provides sweetness, its primary role here is as a reducing sugar for the Maillard reaction. It also helps to tenderize the crumb and retain moisture.
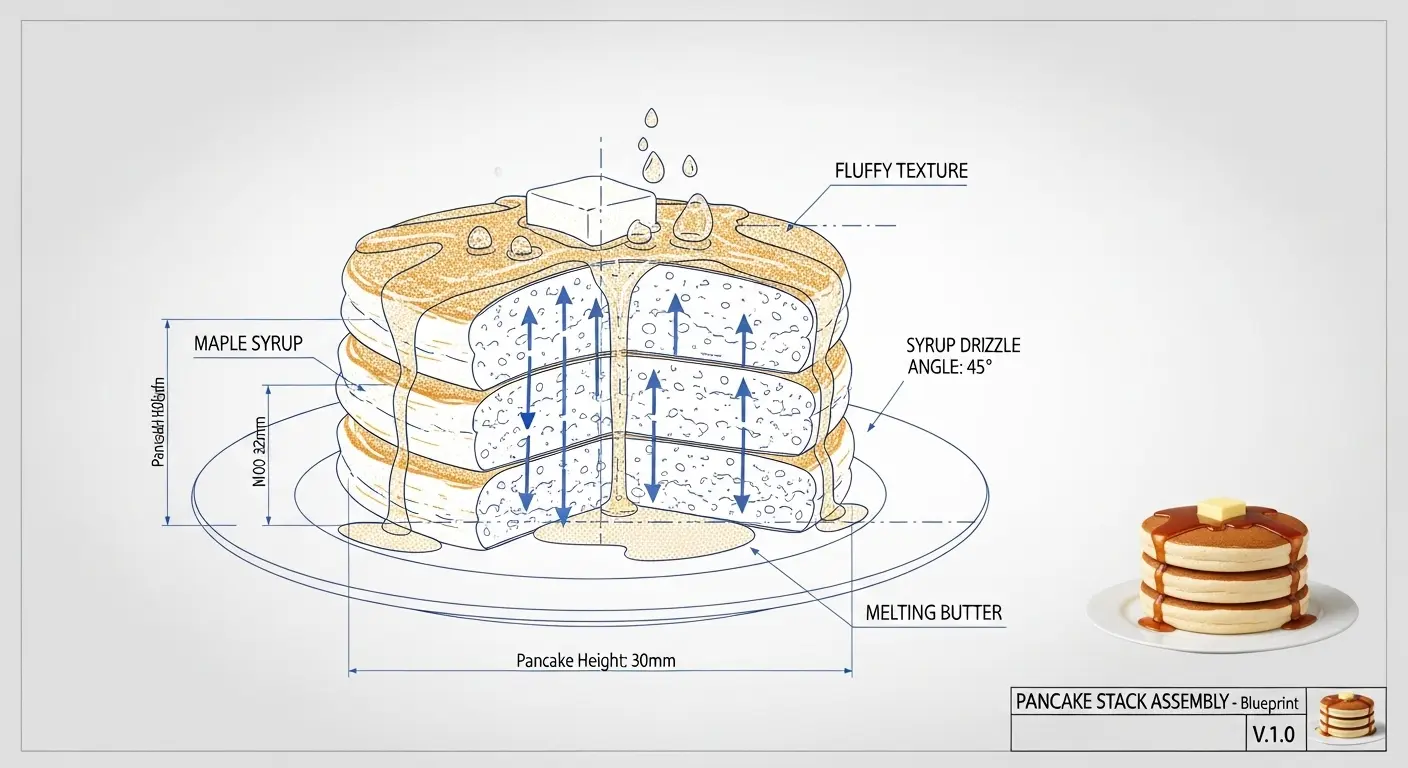
- Baking Powder (Double-Acting): This is your gas-generation system. It’s a pre-packaged acid-base mixture. The first reaction occurs when it’s hydrated, releasing some carbon dioxide. The second, more vigorous reaction occurs when heated, releasing more CO2 and creating the fluffy, light texture you so desire.
- Salt: A flavor enhancer, yes, but it also tightens the gluten network slightly. Use it sparingly, but do not omit it.
- Milk or Buttermilk: The hydration medium. Buttermilk, being acidic, will give the baking powder an extra boost and contributes a pleasant tangy flavor profile. The lactose (a sugar) and proteins in milk will also participate in the Maillard reaction.
- Egg: A multi-purpose tool. The proteins in the yolk and white coagulate with heat, providing structure. The yolk adds fat and emulsifiers (like lecithin), which create a richer, more tender final product.
- Melted Butter (Unsalted): This is a lipid-based tenderizer. By coating the flour particles, the fat physically obstructs the formation of long gluten strands. It is crucial for a soft texture.
Phase 2: The Reaction Procedure
Follow these steps precisely. Sequence is critical.
Step 1: Homogenize Dry Components. In a large vessel, whisk together your flour, sugar, baking powder, and salt. This ensures even distribution of the leavening agent. An uneven distribution will result in pancakes with dense spots and chemical-tasting pockets. Inefficient.
Step 2: Create the Emulsion. In a separate, smaller vessel, whisk the egg until uniform, then incorporate the milk and cooled melted butter. You are creating a stable emulsion of fat and liquid.
Step 3: Combine Reactants (The Crucial Step). Pour the wet mixture into the dry mixture. Using a spatula or whisk, mix only until the components are just combined. I must emphasize this: DO NOT OVERMIX. Lumps are not just acceptable; they are a visual indicator of success. Each stroke of the whisk develops the gluten network. Your goal is a weak, undeveloped network. A few seconds of mixing is all that is required.
Step 4: The Resting Period. Allow the batter to rest for 5 to 10 minutes. This allows the flour to hydrate fully and the gluten strands that you did form to relax. You will be rewarded with a more tender pancake.
Phase 3: Application of Thermal Energy & The Maillard Reaction
This is where the magic, which is actually just chemistry, happens.
Step 1: Prepare the Surface. Heat a griddle or pan over medium heat. The surface temperature should be approximately 190°C (375°F). This temperature is high enough to initiate the Maillard reaction quickly but low enough to cook the interior before the exterior burns.
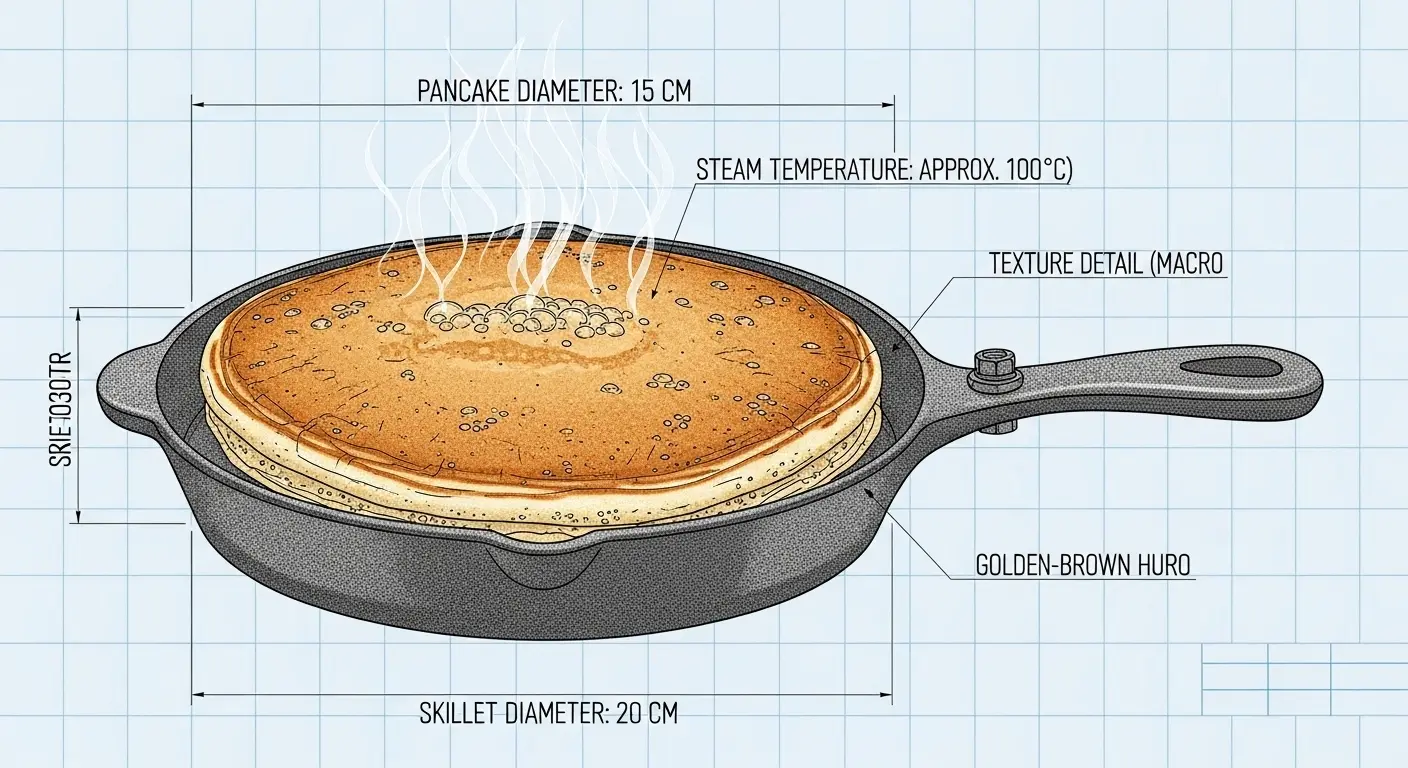
Step 2: Cook Side One. Ladle your desired amount of batter onto the hot, lightly greased surface. As heat transfers via conduction, two things happen. First, the baking powder goes into its second stage of reaction, releasing a final burst of CO2 gas that inflates the pancake. You will observe bubbles forming and popping on the surface. This is the gas escaping. Second, the Maillard reaction begins.
Step 3: Analyze and Flip. Once the edges look dry and bubbles cover the surface, it is time to flip. The first side should be an even, golden-brown. This color and the complex, toasty aromas are the result of the Maillard reaction—a cascade of chemical changes between the amino acids (from the egg, milk, and flour) and the reducing sugars (from the sugar and milk). This is not caramelization; it is a far more complex and flavorful process.
Step 4: Cook Side Two. The second side will cook faster, as the batter is already hot. It will likely be less evenly browned due to the uneven, bubbled surface. This is expected. Cook for another minute or two until golden.
Conclusion: Analysis Complete
You have now successfully executed a controlled chemical reaction resulting in a superior breakfast food. By managing gluten, optimizing leavening, and initiating the Maillard reaction, you have transcended the realm of guesswork. Consume your delicious data, and remember that the universe is governed by laws, even in your kitchen.